Example: waiting lists
Waiting lists often include people who no longer need an appointment: they’ve recovered, been seen elsewhere or moved. Asking them directly by text, and reading the answers in the spreadsheet the list is kept in, is a quick way to find them and shorten the list.
The waiting list
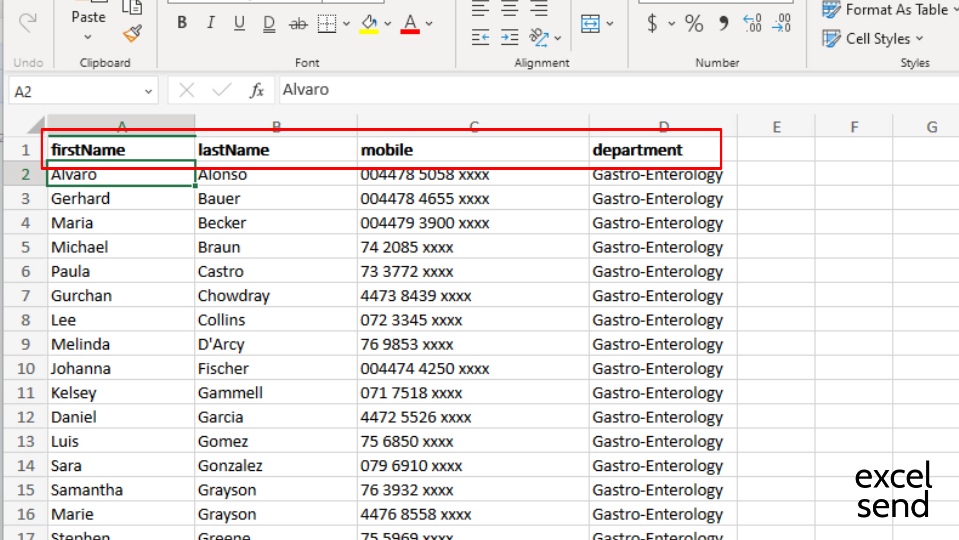
Row 1 has the column headers. Each row below is a patient: first name, last name, mobile number and the department they’re waiting for.
Set up the send
Open ExcelSend from Home → Send SMS, then on the Send New tab:
- Choose the mobile number column in Mobile number field:.
- Under Replies:, choose Allow replies. Patients need to be able to answer.
- Tick Add 17 character opt-out link if you want to offer an opt-out.
- Leave Send When: on Now.
- Tick Add report fields to spreadsheet. This is how the answers come back to the list.
The message
^^firstName^^ ^^lastName^^, you are currently on a waiting list to see a ^^department^^ consultant. Would you like to remain on this waiting list? Please reply YES or NO to this message.
Each merge field matches a column header. You can save the message to reuse it for the next list.
Preview and send
Click Create Preview. ExcelSend merges the message with each row, so you can check every message, the cost and the total before clicking Send messages.
Then wait. Allow 24 to 48 hours for most replies to come in.
Read the replies
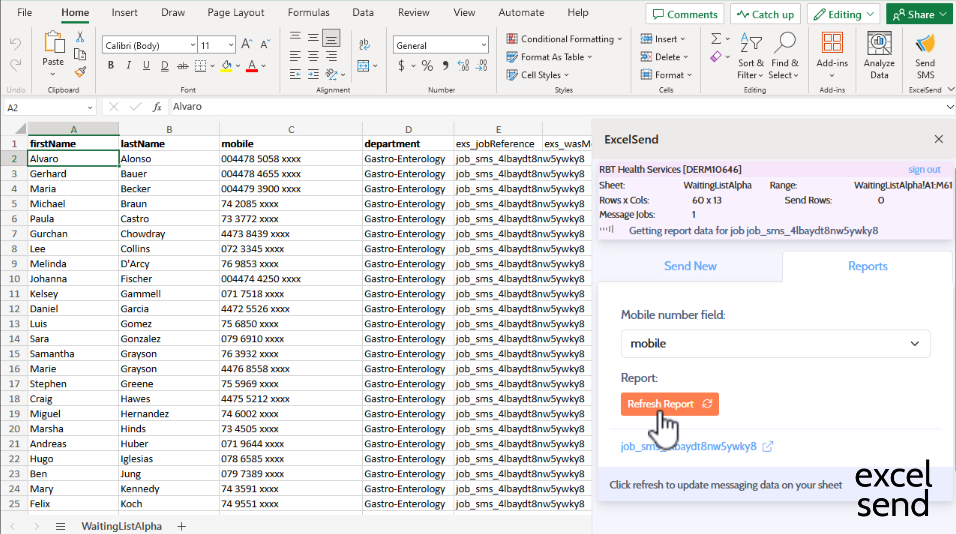
- Open the same workbook, click a single cell and open ExcelSend.
- On the Reports tab, click Refresh.
The report columns to the right of the list fill in for each patient:
See Report columns for what each column holds.
Several report columns contain Yes and No, such as exs_wasMessageSent. Only exs_reply holds the patient’s answer.
Shorten the list
- Hide or delete the report columns you don’t need.
- Sort by
exs_reply. - Review the NO replies and remove those patients from the list, following your department’s validation process.
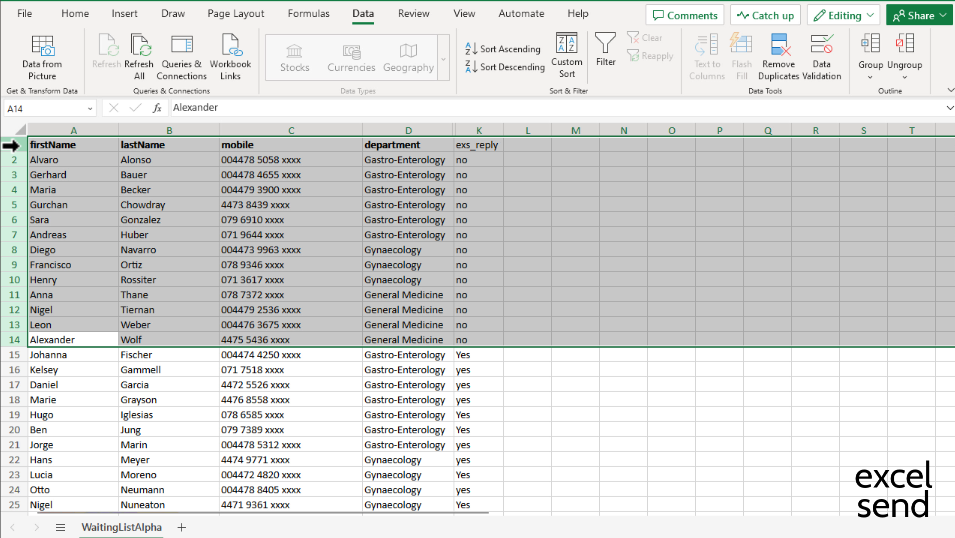
Patients who haven’t replied can be followed up by phone, or sent a second message from a new copy of the sheet.